Monday, April 30, 2012

Crab Stuffed Rigatoni


I've had this pasta for awhile. I picked it up on sale with the thought of, I could stuff these. With what? I had no idea, I'd never stuffed a noodle before! Although it is on my bucket list-check that one off! While shopping my husband says, we should buy some crab. Me: how on earth would I prepare it? So we bought it not quite knowing what to do with it. Then the idea formed: put them together. So I researched some recipes and realized I am not sophisticated, I don't like scallions and there were many ingredients that I didn't have a clue what they were (some were definitely foreign). But from the recipes I was able to get the gist of what might taste good with the crab. And I decided to make my own recipe-gasp!

Here's my list of ingredients:
2 tomatoes, cut like the picture below
1 garlic clove (prob would do more next time, was just what I had)
3 green onions
1 t italian seasoning
1 t oregano
pinch of salt
pinch of black pepper
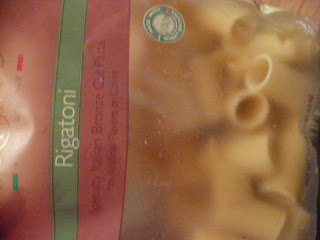
8 oz of Rigatoni noodles (picture below)
4 oz cream cheese (1/2 pkg)
2 T Parmesan cheese
8 oz imitation crab meat
1 jar alfredo sauce
1.5 c chicken broth (mine was homemade, so had some other seasonings in it as well)

1. Boil water
2. Cook noodles about 5 minutes-they should not be done. These are the ones I used. About a 1/2 inch diameter.
3. Mince garlic
4. While noodles are cooking blend the crab meat, cream cheese and Parmesan cheese and garlic in blender. I use our Ninja-one of my favorite kitchen appliances.
5. Cut tomatoes and green onions
6. Drain noodles and run cold water over them.
7. Preheat oven to 350 degrees F
8. Start stuffing noodles. I used a stick from a candied apple to help push it in. This will take awhile. Place in greased 9x13 baking pan after stuffed.
9. When you need a break from stuffing, put alfredo sauce, chicken broth and spices in a saucepan. Heat til warm and turn off.
10. Stuff the rest of your noodles.
11. Sprinkle tomatoes over stuffed noodles.
12. Pour sauce over noodles and tomatoes.
13. Bake at 350 degrees for 30 minutes.


And the end result? DELICIOUSNESS!


Saturday, April 14, 2012

Tee Shirt Scarf

What an idea! Taking old tee shirts and turning them into scarves! I first saw this on Pintrest and fell in love. You can find my inspiration here (no need to have an account, I linked to her blog). There I found the video on how to create several no sew scarves. The video on several scarves is here. With all this inspiration, I had to give it a try. I am part of an online garage sale site for my area, so I posted I was looking for large tee shirts to craft with. I had one generous lady give me several her husband no longer wore (although my husband snagged the batman and joker one, a kid at heart). Still, there were lots to use. I also bought some other shirts for .25 each from another lady, so I had plenty to work with. Overall I spent about a dollar and have only used 2 shirts and a small portion of another. They will go a long ways!

In the making (see links above for tutorial):


I'm a girl who likes diversity, so I made these to be changed up a bit. I deviated from the video by cutting my spirals about an inch thick, instead of 2. This made the strips longer (as well as thinner) and I didn't have to put two together. I didn't tie them together in the back. Rather, I draped them around my neck and just tied them in front. This way I can separate the white and the blue for a couple different scarves.

The flowers are also interchangeable. I used this link to make my flowers. Since I wanted to change it up, I took a strip of the tee shirts and added velcro.

Tee Shirt Vest

Ok, ladies, this isn't my typical post. It isn't paper. It's fabric. No I didn't sew :) Ok, here are the pictures. BEFORE: Shirt from Old Navy (given to me). The tutorial where I learned about this said at least an XL, I did a XXL, just because that is what I was given. Yes, I followed a tutorial, I can't take credit for this idea. You can find the tutorial here. It did probably take about 5 minutes, that isn't an exaggeration. Cute, right? Thanks Wobisobi!

Tuesday, April 3, 2012

Modest Dress

One of the things that is difficult for a Christian woman to do is dress modestly. As a Christian woman, I want to make sure my brothers in Christ are not being tempted by my attire (and I don't think my husband would want them tempted either). With the fashions being short, short, short and me not wanting to dress like a woman far beyond my years, I've been looking for a solution for awhile. I recently picked up the colorful dress below for $2, yes, I hit the sales racks :) But it is pretty short. I hadn't worn it yet because I was unsure about how short it was.

Enter: solution on pintrest, here. You can find the tutorial about how to turn a pillowcase into a skirt at the above link. Amazingly, it is a no sew project!
So I did end up sewing it because it was well below my knee otherwise. So I cut it down to 17 inches (I'm 5 foot 4 inches tall) and resewed (not well) the top to put the drawstring in. There is a reason I didn't show you my sewing job. Layered under the dress, it makes it modest and still looks cute! If you find a pillowcase that is thick enough, you could also wear it on it's own (how the pinned version was intended), but this one was too see through for that. Also a great option for longer skirts with no inner lining!This added a good 6 inches to the dress :) And here is a close-up. Although the dress is hanging at a funny angle, because my photographer had to go and I can't stand straight and take a picture at the same time.